


Missing Stops in 3D Puff Embroidery?
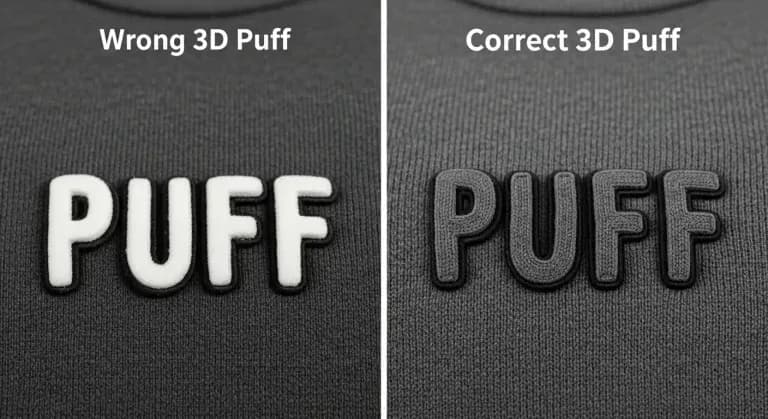
3D puff embroidery gives your designs a bold, raised look that stands out on caps, jackets, and sportswear. But here is the problem: if your digitized file is missing color stops, the foam stays exposed, the stitches look thin, and the whole design falls apart after a few washes.
This is one of the most common mistakes in 3D puff digitizing, and it happens because the embroidery machine does not pause at critical moments. Without stops, the operator cannot insert foam or trim threads properly, leading to messy, unprofessional results. This guide shows you exactly where to add color stops in your 3D puff files so your designs come out clean, raised, and production-ready every single time.
⚡ Quick Answer
Where do you add color stops in 3D puff embroidery files?
- Add a stop immediately after the foam underlay stitches so the operator can place the foam sheet
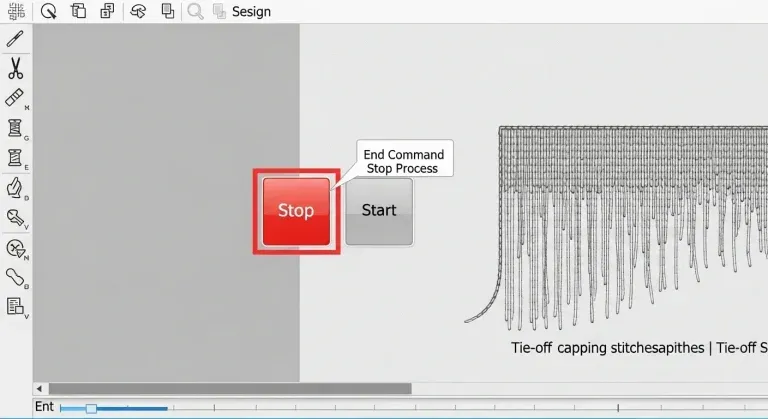
- Add a stop after the satin capping stitches so the operator can trim excess foam before borders
- Use a trim-and-stop command rather than a stop alone to cut loose threads at each pause point
- Test the file on the actual production fabric before running any batch
What Are Color Stops in 3D Puff Embroidery?
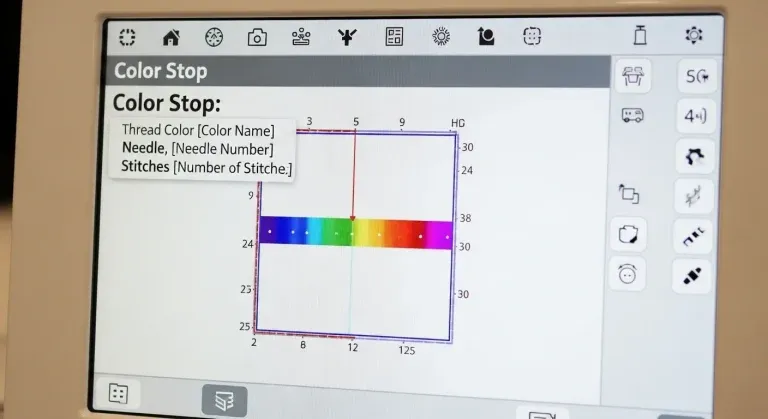
A color stop is a pause command inserted into your embroidery file. When the machine hits a stop, it pauses stitching and holds position, allowing the operator to take action before the next layer begins.
In 3D puff embroidery, color stops are essential because the production process requires physical intervention between stitch layers. At each stop, the operator needs to:
- Place the foam sheet on top of the underlay stitches before the capping layer runs
- Trim jump threads before the next color layer begins
- Remove excess foam that extends beyond the stitched area
- Check alignment and foam position before continuing
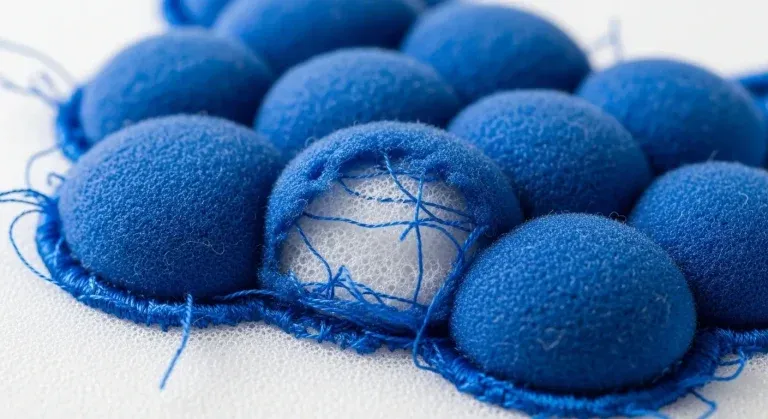
⚠️ Without these stops, the machine runs continuously. This means the foam either gets buried under too many stitches or stays exposed because the capping layer never covers it properly. Neither outcome is acceptable for professional production.
The Correct 3D Puff Stitch Sequence
Before covering where stops go, you need to understand the full stitch layer sequence for 3D puff embroidery. Every layer has a specific function, and the stops exist to bridge the gap between the layers that require physical operator input.
| Step | Layer | Function | Stop Needed |
|---|---|---|---|
| 1 | Underlay stitches (running or zigzag) | Stabilizes fabric; provides base for foam placement | ✓ STOP after this |
| 2 | Foam placement (operator action) | Operator places foam sheet on top of underlay | No stitch layer; manual step |
| 3 | Satin capping stitches | Locks foam underneath; creates the raised 3D effect | ✓ STOP after this |
| 4 | Foam trimming (operator action) | Operator removes excess foam from outside the capped area | No stitch layer; manual step |
| 5 | Border and detail stitches | Defines edge, adds detail, sharpens the final design appearance | No stop needed unless color change |
Why Missing Stops Happen
Understanding why stops are missing is the first step to preventing the problem. Here are the most common reasons digitizers fail to add them:
Auto-digitizing software does not add stops by default
Auto-digitizing tools convert artwork into stitch files without understanding the production process. They assign stitch types and sequences but have no knowledge of foam placement requirements. Color stops must always be added manually by a digitizer who understands 3D puff production.
Inexperienced digitizers skip this step to save time
Digitizers unfamiliar with 3D puff production often copy the stitch sequence from a flat embroidery file and add puff stitches without adjusting the stop structure. The resulting file runs without pauses and the operator has no opportunity to place the foam correctly.
File conversions lose stop commands
When converting between embroidery formats such as DST, PES, and EMB, stop and trim commands are sometimes dropped or misinterpreted. If you receive a 3D puff file that was converted from another format, always verify that all stops are present before running production.
Template misuse: copying flat designs without adjustment
A common shortcut is to take a flat embroidery design template and simply add puff stitches without rebuilding the stop structure. Flat designs have no foam placement requirements and therefore no stops in the right positions. Using them as a base for 3D puff without structural changes always produces missing-stop problems.
Step-by-Step: Where to Add Color Stops in 3D Puff Files
1 Add a Stop After the Foam Underlay
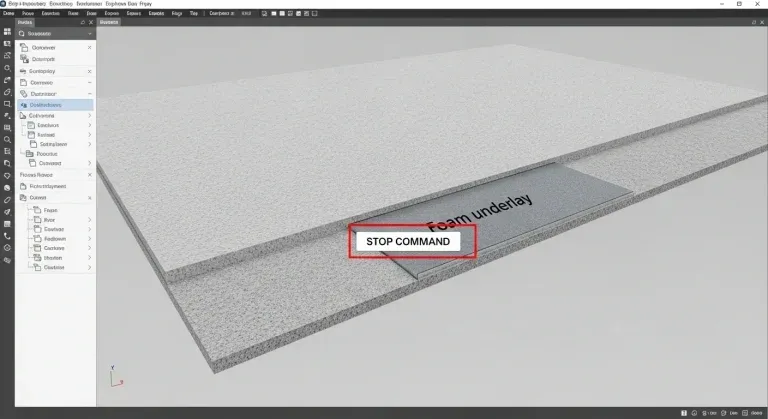
The first stop should come immediately after the foam underlay stitches. This is the layer that holds the fabric flat and provides the base surface on which the operator places the foam sheet. Without this stop, the machine moves directly into the capping stitches before any foam has been placed.
The correct sequence at this stage:
Step 1: Underlay stitches (running stitch or zigzag pattern)
Step 2: STOP COMMAND (insert here)
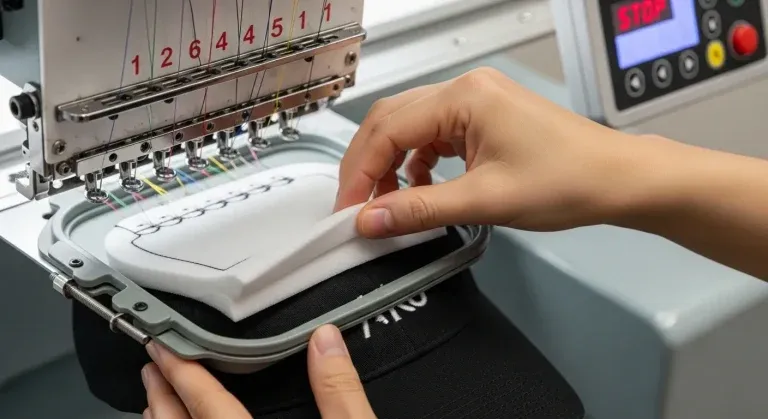
Step 3: Operator places foam sheet on top of underlay
Step 4: Machine resumes; satin capping stitches lock foam in place
When the machine stops, the operator lays the foam sheet flat over the underlay area. The foam must be positioned accurately before the capping layer begins, because the capping stitches seal the foam permanently underneath the raised surface.
💡 Pro tip: Use a trim-and-stop command at this point rather than a stop alone. The trim cuts any loose jump threads before the operator adds the foam, keeping the underlay surface clean and preventing thread tails from getting trapped under the foam sheet.
2 Add a Stop After the Satin Capping Stitches
The second stop should come after the satin capping layer has completed. The capping layer is the visible satin stitching that runs over the foam and creates the raised 3D effect. After this layer is finished, there is typically excess foam extending outside the stitched area that must be removed before any border or detail work begins.
At this stop, the operator needs to:
- Remove excess foam that extends beyond the stitched and capped area
- Trim any jump threads before adding borders or detail stitching
- Inspect the puff quality and foam coverage before the final layer runs
If you skip this stop and go straight into border stitching, the excess foam can shift or bunch up under the border pressure, ruining the final edge definition and making the design look uneven.
Complete correct stitch sequence:
1. Underlay stitches
2. STOP (operator places foam)
3. Satin capping stitches
4. STOP (operator trims excess foam and inspects)
5. Border or detail stitches (if needed)
✅ This two-stop structure gives the operator full control at both critical intervention points and ensures the foam is correctly placed and trimmed before the design is finalized.
3 Test Your File on Actual Production Fabric
Before running any production batch, always test your 3D puff file on the same fabric type you will use in production. Cap twill, jacket back material, and t-shirt knit all behave differently under puff embroidery, and a file that works on one fabric may need density or stop position adjustments on another.
What to check during the test sew-out:
- Confirm the machine pauses at each stop point and holds position
- Verify the foam sits flat on the underlay without shifting during placement
- Confirm the satin capping stitches seal the foam completely with no gaps or exposed foam edges
- Check that the raised height is consistent across the entire design element
- Verify the border and detail stitches sit cleanly against the capped surface without distortion
⚠️ If the foam still shows through the capping stitches or the edges look messy after the test, go back and increase your capping stitch density or add a second capping pass. Do not approve the file for production until the test sew-out is clean.
Common 3D Puff Digitizing Mistakes That Cause Stop Problems
✗ Using a flat embroidery file as a 3D puff template
Flat designs have no foam placement requirements and no stops in the right positions. Converting them to 3D puff by simply adding a puff underlay without restructuring the stop sequence always produces a file where the machine runs past the foam placement point without pausing.
✗ Setting capping stitch density too low
Sparse capping stitches leave gaps through which the foam remains visible. Capping stitches for 3D puff need to be set tighter than standard satin stitches to fully compress and cover the foam surface. A density of 0.35mm to 0.38mm is typically needed for complete foam coverage in capping layers.
✗ Using foam that is the wrong thickness for the design size
Standard 3D puff foam comes in 3mm and 6mm thickness. Using 6mm foam on small lettering or tight design elements creates over-puffing that distorts the satin capping stitches. Use 3mm foam for text and small design elements; reserve 6mm for large bold block designs on cap fronts.
✗ Adding borders before trimming excess foam
Running border stitches over untrimmed foam causes the border needle to punch through the foam material, creating pulled and uneven borders that look amateurish. The second stop exists specifically to prevent this; the foam must be trimmed before any border or detail work begins.
✗ Not checking stop commands after file format conversion
Converting a 3D puff file between formats such as EMB to DST or PES can drop or reinterpret stop commands. Always open the converted file in your digitizing software and verify that all stops are present in the correct positions before sending the file to the machine.
Troubleshooting 3D Puff Stop Problems
| Symptom | Most Likely Cause | Fix |
|---|---|---|
| Foam visible through capping stitches | Capping stitch density too low; single pass only | Increase density to 0.35mm to 0.38mm; add second capping pass |
| Machine does not stop for foam placement | Stop command missing after underlay layer | Open file in digitizing software; insert stop-and-trim after underlay stitches |
| Border stitches look pulled or uneven | Excess foam not trimmed before border layer ran | Add stop after capping layer; trim foam fully before border stitches begin |
| Raised height inconsistent across the design | Foam sheet not positioned flat before capping began | Confirm stop is placed correctly; retrain operator on foam placement procedure |
| Stops present in software but not on machine | Format conversion dropped stop commands | Re-export from native digitizing software; verify stops in machine reader before production |
| Foam bunching or shifting after capping | Foam too thick for design element size | Switch from 6mm to 3mm foam for smaller text and tight design elements |
| Thread tails visible under the foam layer | No trim command before the first stop | Replace stop-only with trim-and-stop at the end of the underlay sequence |
DIY Digitizing vs. Professional 3D Puff Services

You can fix missing stops yourself if you have access to professional digitizing software such as Wilcom, Hatch, or Brother PE Design. But if you are working with complex logos, tight deadlines, or multiple design variations, manual fixes take significant time and experience to do correctly.
| DIY Approach | Professional Digitizing (Sassy Digitizing) |
|---|---|
| 30 minutes to 2 hours per design depending on complexity | 4 to 6 hour turnaround; files tested before delivery |
| Requires knowledge of stitch sequencing and 3D puff production | Handled by specialists with 3D puff production experience |
| High risk for first-time 3D puff digitizers | Low risk; every stop position tested on actual fabric |
| Requires stop verification after every format conversion | Files delivered in any format with stops fully intact and verified |
| Density settings for foam compression require trial and error | Density adjusted for each foam thickness and fabric type |
| No revision process; you troubleshoot your own results | Free revisions until the file is clean and production-ready |
Professional Tips for Clean 3D Puff Results
- Always use trim-and-stop, not stop alone. A stop command pauses the machine but does not cut loose threads. A trim-and-stop command both cuts the thread and pauses the machine, giving the operator a clean working surface for foam placement. This single change eliminates the most common source of thread tails trapped under foam.
- Match foam thickness to design element size. Use 3mm foam for any text or design element under 2 cm in height. Use 6mm foam only for large, bold block designs on structured cap fronts where maximum raise is the design goal. Using 6mm on small text causes over-puffing that distorts the satin capping stitches.
- Increase capping stitch density for complete foam coverage. Standard satin stitch density is 0.40mm to 0.45mm. For 3D puff capping stitches, reduce this to 0.35mm to 0.38mm. The compressed foam surface needs denser stitching to prevent the foam from showing through between stitch rows, especially at design edges.
- Verify stop commands after every file format conversion. Stop and trim commands are among the first elements to be corrupted or dropped during format conversion. After any conversion between EMB, DST, PES, or other formats, open the file in your digitizing software and scroll through the stitch sequence to confirm all stops are present and in the correct positions.
- Run operator training on foam placement before production. Even a perfectly structured file produces poor results if the operator places the foam incorrectly. Foam must be positioned flat, centered on the underlay area, and pressed gently to adhere to the underlay stitches before the machine is restarted. Inconsistent foam placement produces inconsistent raise height across the production run.
Summary: 3D Puff Stop Placement Checklist
| ✅ | Stop 1: Trim-and-stop command placed immediately after the foam underlay stitches |
| ✅ | Stop 2: Stop command placed after satin capping stitches; before borders or detail work |
| ✅ | Density: Capping stitches set to 0.35mm to 0.38mm for complete foam coverage |
| ✅ | Foam: 3mm for text and small elements; 6mm for large bold cap designs only |
| ✅ | Conversion: Verify all stop commands present after any format conversion |
| ✅ | Test: Sew-out on production fabric before approving the file for the full batch |
Frequently Asked Questions (FAQs)
Need Perfectly Digitized 3D Puff Files?
Sassy Digitizing specializes in 3D puff, applique, and chenille digitizing. Our team manually inserts every stop, adjusts density for foam compression, and tests each file to ensure production-ready quality before delivery.
4 to 6 hour turnaround with free revisions included on every 3D puff order.
Keith Blair
Senior Quality Control (HOD)
As the Head of Quality Control at Sassy Digitizing, Keith brings over 12 years of hands-on commercial embroidery experience to the table. He is our resident problem-solver, specializing in the technical nuances of stitch density, pull compensation, and complex digitizing. When he's not establishing quality standards for 3D puff and appliqué, you'll find him perfecting the art of small lettering to ensure every stitch counts.
Expertise:
Related Articles

Knockdown Tackdown Stitch Embroidery: The Complete Guide
Knockdown tackdown stitch embroidery is the layer most digitizers skip and the one that matters most on fleece, terry cl…

Best Embroidery Digitizing Service 2026 | Sassy Digitizing
Scale your apparel brand or embroidery shop with the best embroidery digitizing service of 2026. Sassy Digitizing comple…

Best Embroidery Digitizing Settings for Hats and Caps
Stop ruining structured hats with flat sew files. Discover the essential digitizing secrets for curved 3D surfaces inclu…