


How to Hide Jump Stitches in Embroidery?
If you have ever stitched a logo and noticed the fabric color or underlay thread peeking through your top color, you are not alone. This frustrating issue is called color show-through or thread gapping, and it is one of the most common embroidery problems that can ruin an otherwise perfect design.
The good news is that it is almost always a digitizing issue, not a machine problem. In this guide, we explain exactly why color show-through happens and how to fix it permanently in three steps.
⚡ Quick Answer
How do you fix color show-through in embroidery?
- Increase stitch density to 4.0 to 5.0 lines per millimeter based on the fabric type
- Add proper underlay stitches (edge walk for satin; zigzag or lattice for fill areas)
- Set fill stitches at a 45-degree angle or perpendicular to the longest edge of the shape
What Causes Color Show-Through in Embroidery?
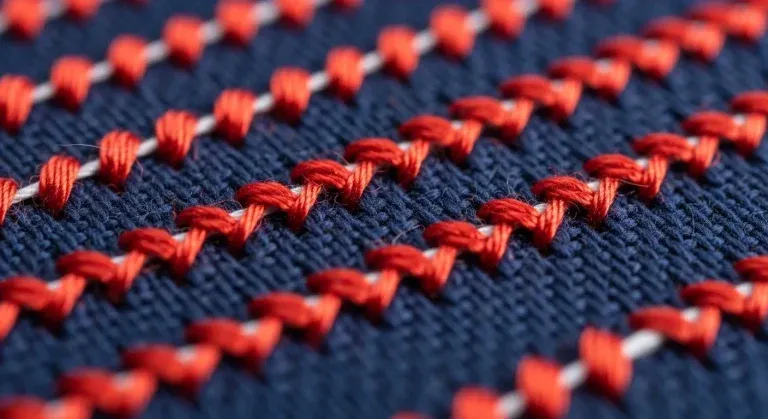
Color show-through happens when there is not enough stitch density to fully cover the fabric beneath the top color. The gaps between stitch rows allow the base fabric color, the stabilizer, or the underlay thread to remain visible on the finished surface.
Understanding the root cause is essential because the fix is different depending on which cause is responsible. Here are the three main culprits:
1. Low Stitch Density
When your digitizing software sets the stitch density too low, the threads do not pack tightly enough together. This leaves tiny gaps between stitch rows where the fabric color shows through, especially on dark or strongly colored garments where the contrast between fabric and thread is immediately visible.
2. Wrong or Missing Underlay
Without proper underlay stitching, the top stitches sink into the fabric fibers instead of sitting on top of them. This is especially problematic on textured surfaces such as pique polo or fleece, where the fabric pile pulls the top stitches down into the surface and creates uneven coverage with visible gaps between stitch rows.
3. Incorrect Stitch Direction
If your fill stitches run parallel to the edges of the shape, they can pull apart during production and expose the fabric underneath. This is a directional tension problem: stitches aligned with the shape edge have less cross-structure to hold them in position than stitches that cross the shape at an angle.
⚠️ Color show-through is almost always a digitizing file problem, not a machine problem. Adjusting tension, changing thread brands, or re-hooping will not fix it. The file must be corrected at the source.
How to Identify Which Cause Is Responsible
| What You See | Most Likely Cause | Primary Fix |
|---|---|---|
| Uniform thin gaps across the entire fill area | Stitch density too low throughout | Increase density to 4.5 to 5.0 lines per mm |
| Stitches sinking into fabric; design looks flat and sunken | Missing or incorrect underlay | Add edge walk or zigzag underlay perpendicular to top stitches |
| Gaps concentrated along one side or axis of the design | Stitches running parallel to the shape edge | Change fill angle to 45 degrees or perpendicular to the longest edge |
| Show-through only on textured or pile fabric, not on smooth test material | Top stitches sinking into pile without underlay support | Add underlay and water-soluble topping on the fabric surface |
| Fabric color visible at fill edges but not in the center | Insufficient edge padding; fill not reaching the outline | Add 0.3mm to 0.5mm edge padding to extend fill to the border |
The 3-Step Fix for Color Show-Through
1 Increase Stitch Density
The ideal stitch density for most embroidery fabrics is 4.0 to 5.0 lines per millimeter. If you are seeing color show-through, your current density is almost certainly below this range. Most auto-digitized files default to settings optimized for speed rather than coverage, leaving density too open for full color opacity on standard garment fabrics.
Recommended density settings by fabric type:
| Fabric Type | Density (lines per mm) | Notes |
|---|---|---|
| Light fabrics (polo shirts, t-shirts) | 4.5 to 5.0 | Higher density needed to prevent show-through on thin fabric |
| Medium fabrics (canvas, denim, twill) | 4.0 to 4.5 | Standard density range; fabric structure provides base support |
| Stretch fabrics (knits, performance wear) | 3.5 to 4.0 | Lower density prevents puckering while still providing coverage |
| Textured fabrics (pique polo, terry cloth) | 4.5 to 5.0 + topping | Dense pile requires higher density plus water-soluble topping |
| Heavy fabrics (fleece, heavy knit) | 3.5 to 4.0 | Fabric weight provides structure; avoid over-density that causes puckering |
Most digitizing software allows you to adjust density in the fill stitch properties panel. Increase it gradually and run a test sew-out to confirm full coverage before adjusting further. Do not jump straight to maximum density; over-dense stitching causes puckering, thread breaks, and needle damage on lightweight fabrics.
💡 Pro tip: Always test on the same fabric you will use in production. A density that eliminates show-through on a test square of standard cotton may still leave gaps on a textured pique polo or lightweight performance shirt.
2 Add Proper Underlay Stitches
Underlay stitches create a foundation layer that holds the fabric flat and prevents your top stitches from sinking into the fabric fibers. Without proper underlay, even high-density top stitching can appear sparse because the stitches are disappearing into the fabric rather than sitting on its surface.
Which underlay type to use:
| Stitch Type | Recommended Underlay | Why |
|---|---|---|
| Satin stitches (text, narrow columns) | Edge walk underlay or center run | Locks column edges; prevents satin stitches from rolling off the sides |
| Fill stitches (large areas) | Zigzag underlay or lattice underlay | Creates a grid foundation that raises top stitches above the fabric surface |
| Wide satin columns (over 6mm) | Double zigzag underlay | Wide columns need more internal structure to prevent splitting and sagging |
| Textured pile fabrics (pique, fleece) | Zigzag underlay plus water-soluble topping | Underlay flattens pile; topping holds top stitches above the fabric surface |
Critical rule: The underlay should always run perpendicular to your top stitches. Underlay running in the same direction as the top stitches provides no cross-structure benefit. Perpendicular underlay creates a grid that top stitches can lock onto, keeping the entire stitch layer elevated above the fabric surface.
✅ At Sassy Digitizing, every file includes optimized underlay matched to the fabric type. Underlay is never left at default auto-settings because auto-underlay assignments are consistently wrong for the majority of real-world production fabrics.
3 Fix the Stitch Direction
Stitch direction has a significant effect on coverage quality, even at the same density setting. Fill stitches that run parallel to the edges of a shape can pull apart during production under thread tension, creating gaps where the fabric shows through along that edge. Stitches that cross the shape at an angle distribute tension in multiple directions and maintain tighter coverage.
| Wrong Approach | Correct Approach |
|---|---|
| Fill stitches running parallel to the shape edges | Fill stitches at 45 degrees to the shape edges |
| All fill elements in the design at the same angle | Adjacent fill elements at alternating angles (45 and 135 degrees) |
| Underlay and top stitching running in the same direction | Underlay perpendicular to top stitching for maximum cross-structure |
| Horizontal or vertical fill on rectangular shapes (0 or 90 degrees) | Diagonal fill at 45 degrees distributes tension evenly across both axes |
Always set your fill stitches at a 45-degree angle or perpendicular to the longest edge of the shape. This prevents stitches from pulling apart and maintains consistent coverage across the entire fill area. For designs with multiple adjacent fill elements, alternate the fill angle between elements for a more refined, professional appearance.
💡 Expert insight: Varying fill angles between adjacent design elements does more than prevent show-through. It also breaks up the repetitive texture of uniform fill directions and gives large fill areas a more polished, less mechanical visual appearance.
Common Mistakes That Cause Color Show-Through
✗ Using auto-digitizing software without manual density review
Auto-digitizing tools assign density based on the artwork complexity, not the production fabric type. The default settings are almost always too low for lightweight or textured garments. Every file produced by auto-digitizing software needs manual density review before production.
✗ Skipping underlay on fill areas
Many digitizers add underlay to satin columns but leave fill areas without it. Fill areas on any fabric with surface texture will sink without underlay support, creating uneven coverage regardless of how high the density is set. Underlay is not optional for fill stitches on production garments.
✗ Testing on different fabric than production
A density setting that eliminates show-through on a smooth cotton test square may still leave visible gaps on a Nike Dri-FIT performance polo. The fabric structure, surface texture, and stretch content all affect stitch coverage. Always test on the actual production garment before approving the file.
✗ Setting underlay in the same direction as the top stitching
Underlay running in the same direction as the top stitching layer adds thread to the same channels without creating cross-structure. The fabric fibers are compressed in one direction only and the top stitches still have no stable base to grip. Underlay must run perpendicular to the top stitching to function correctly.
✗ Increasing density without checking for puckering
Increasing density eliminates show-through but too much density on lightweight fabrics causes puckering. The two problems are opposite ends of the same scale. Always increase density in small increments (0.1 to 0.2 lines per mm) and test sew at each stage to find the point of full coverage without fabric compression.
Troubleshooting Color Show-Through Problems
| Symptom | Most Likely Cause | Fix |
|---|---|---|
| Fabric color visible evenly across the entire fill area | Density too low across the whole element | Increase density to 4.5 to 5.0 lines per mm; test on production fabric |
| Show-through at edges only; center coverage acceptable | Fill not reaching the outline; insufficient edge padding | Add 0.3mm to 0.5mm edge padding to the fill element |
| Stitches sunken into fabric surface; design looks flat | Missing underlay; fabric pile pulling stitches in | Add zigzag underlay perpendicular to top stitches; add topping on pile fabrics |
| Gaps concentrated along one direction of the fill | Fill stitches running parallel to the shape edge | Change fill angle to 45 degrees; ensure underlay runs perpendicular to top stitches |
| Density increased but puckering appeared | Density too high for the fabric weight; over-compression | Reduce density slightly; correct underlay to raise top stitches without adding density |
| Show-through on polo but not on test fabric | Polo fabric more open or textured than test material | Re-test specifically on the production polo; increase density and add topping |
When to Use Professional Digitizing
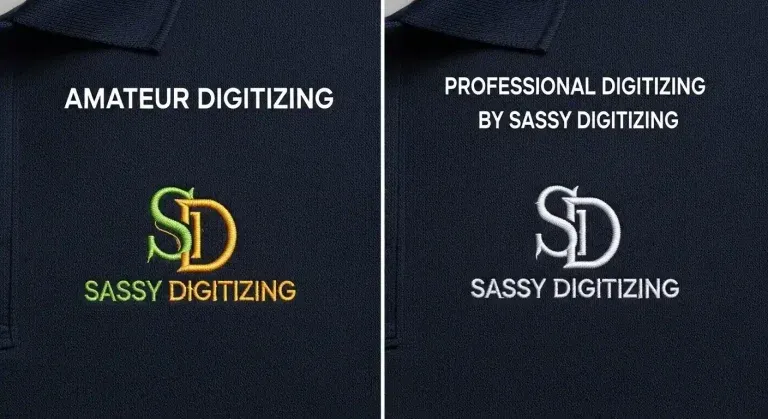
If you are constantly battling color show-through, thread breaks, or puckering across multiple designs, the issue is almost always systematic in the digitizing file. While you can adjust basic settings yourself, professional digitizing eliminates these problems from the start and saves significant time over repeated trial-and-error production testing.
| Amateur / Auto-Digitized File | Professional Digitizing (Sassy Digitizing) |
|---|---|
| Default density set for all fabrics equally | Density manually calculated for the specific production fabric |
| Underlay assigned automatically or skipped entirely | Underlay type and direction manually set per element and fabric type |
| Fill angles set globally, often at 0 or 90 degrees by default | Fill angles set per element at 45 degrees with alternation between adjacent fills |
| No edge padding; fill stops short of outline edges | Edge padding of 0.3mm to 0.5mm added to reach outline cleanly |
| No test sew-out; file sent direct to production | Every file tested before delivery; zero color bleed guaranteed |
| Problems discovered after the production run is finished | Free revisions until the file sews cleanly with no coverage issues |
At Sassy Digitizing, every design is manually digitized using Wilcom software with precise density calculations, proper underlay construction, and optimized stitch direction settings. Files run smoothly on any machine without color bleed, gaps, or coverage issues.
Professional Tips for Perfect Stitch Coverage
- Build a density reference library for every fabric you regularly use. Keep a document listing your tested density, underlay type, and stitch angle settings for each fabric in your production rotation. Cotton pique polo, performance poly, navy fleece, and cap twill each need different settings. Having tested values eliminates repeated trial-and-error testing on repeat jobs.
- Use push compensation to prevent fill gaps at shape edges. Push compensation adds a small extension to the fill boundary so it reaches all the way to the outline stitch. Without it, the fill typically stops 0.2mm to 0.4mm short of the edge, leaving a visible fabric color gap exactly where the outline and fill should meet cleanly.
- Add water-soluble topping on any textured pile fabric. On pique polo, fleece, and terry cloth, fabric pile pulls top stitches down into the surface even with correct underlay. Water-soluble topping holds the top stitches above the pile surface during stitching and dissolves cleanly in the first wash, leaving the stitches permanently elevated and gap-free.
- Alternate fill stitch angles between neighboring elements. Adjacent fill areas at the same stitch angle look visually flat and the gaps between their stitch rows can align, making thin spots appear at the boundary between two colors. Setting neighboring elements at 45 and 135 degrees breaks up any alignment of gaps and produces cleaner color boundaries.
- Check both the front and the back of the test sew-out. Color show-through that is barely visible on the front of a light-colored garment can be dramatically more visible when the garment is held up to light or placed against a dark surface. Always check the front of the test sew-out against a contrasting background to confirm full opacity before approving the file.
Quick Summary
Color show-through happens when stitch density is too low, underlay is missing or incorrect, or stitch direction is wrong. All three problems are fixable in the digitizing file without touching the machine settings.
| ✅ | Density: Increase to 4.0 to 5.0 lines per mm based on fabric type; test on production fabric |
| ✅ | Underlay: Edge walk for satin; zigzag or lattice for fill; always perpendicular to top stitches |
| ✅ | Stitch direction: Fill stitches at 45 degrees; alternated between adjacent elements |
| ✅ | Edge padding: 0.3mm to 0.5mm added to fill boundaries to reach outlines cleanly |
| ✅ | Test: Always test on the exact production garment before approving for the full run |
Frequently Asked Questions (FAQs)
Need Perfectly Digitized Files With No Color Bleed?
At Sassy Digitizing, we manually digitize every design using Wilcom software with precise density calculations, proper underlay construction, and optimized stitch direction settings. Every file is tested and guaranteed to stitch cleanly with no color show-through or coverage gaps.
Production-ready files delivered in 4 to 12 hours with free revisions included.
Keith Blair
Senior Quality Control (HOD)
As the Head of Quality Control at Sassy Digitizing, Keith brings over 12 years of hands-on commercial embroidery experience to the table. He is our resident problem-solver, specializing in the technical nuances of stitch density, pull compensation, and complex digitizing. When he's not establishing quality standards for 3D puff and appliqué, you'll find him perfecting the art of small lettering to ensure every stitch counts.
Expertise:
Related Articles

Knockdown Tackdown Stitch Embroidery: The Complete Guide
Knockdown tackdown stitch embroidery is the layer most digitizers skip and the one that matters most on fleece, terry cl…

Best Embroidery Digitizing Service 2026 | Sassy Digitizing
Scale your apparel brand or embroidery shop with the best embroidery digitizing service of 2026. Sassy Digitizing comple…

Best Embroidery Digitizing Settings for Hats and Caps
Stop ruining structured hats with flat sew files. Discover the essential digitizing secrets for curved 3D surfaces inclu…